Getting Started
The goal of this document is to help get you up and running quickly. So without further ado, let’s get started.
Note
Hopefully you have some familiarity with the flask framework and the peewee orm, but if not those links should help you get started.
Note
For a complete example project, check the example app that ships with flask-peewee.
Creating a flask app
First, be sure you have installed flask-peewee and its dependencies.
You can verify by running the test suite: python setup.py test.
After ensuring things are installed, open a new file called “app.py” and enter the following code:
from flask import Flask

app = Flask(__name__)
app.config.from_object(__name__)

if __name__ == '__main__':
    app.run()
This isn’t very exciting, but we can check out our project by running the app:
$ python app.py
 * Running on http://127.0.0.1:5000/
 * Restarting with reloader
Navigating to the url listed will show a simple 404 page, because we haven’t configured any templates or views yet.
Creating a simple model
Let’s add a simple model. Before we can do that, though, it is necessary to initialize the peewee database wrapper and configure the database:
from flask import Flask

# flask-peewee bindings
from flask_peewee.db import Database

# configure our database
DATABASE = {
    'name': 'example.db',
    'engine': 'peewee.SqliteDatabase',
}
DEBUG = True
SECRET_KEY = 'ssshhhh'

app = Flask(__name__)
app.config.from_object(__name__)

# instantiate the db wrapper
db = Database(app)

if __name__ == '__main__':
    app.run()
What this does is provides us with request handlers which connect to the database on each request and close it when the request is finished. It also provides a base model class which is configured to work with the database specified in the configuration.
Now we can create a model:
import datetime
from peewee import *


class Note(db.Model):
    message = TextField()
    created = DateTimeField(default=datetime.datetime.now)
Note
The model we created, Note, subclasses db.Model, which in turn is a subclass
of peewee.Model that is pre-configured to talk to our database.
Setting up a simple base template
We’ll need a simple template to serve as the base template for our app, so create
a folder named templates. In the templates folder create a file base.html
and add the following:
<!doctype html>
<html>
<title>Test site</title>
<body>
  <h2>{% block content_title %}{% endblock %}</h2>
  {% block content %}{% endblock %}
</body>
</html>
Adding users to the site
Before we can edit these Note models in the admin, we’ll need to have some
way of authenticating users on the site. This is where Auth comes in.
Auth provides a User model and views for logging in and logging out,
among other things, and is required by the Admin.
from flask_peewee.auth import Auth

# create an Auth object for use with our flask app and database wrapper
auth = Auth(app, db)
Let’s also modify the code that runs our app to ensure our tables get created if need be:
if __name__ == '__main__':
    auth.User.create_table(fail_silently=True)
    Note.create_table(fail_silently=True)

    app.run()
After cleaning up the imports and declarations, we have something like the following:
import datetime
from flask import Flask

from peewee import *
from flask_peewee.auth import Auth
from flask_peewee.db import Database

# configure our database
DATABASE = {
    'name': 'example.db',
    'engine': 'peewee.SqliteDatabase',
}
DEBUG = True
SECRET_KEY = 'ssshhhh'

app = Flask(__name__)
app.config.from_object(__name__)

# instantiate the db wrapper
db = Database(app)


class Note(db.Model):
    message = TextField()
    created = DateTimeField(default=datetime.datetime.now)


# create an Auth object for use with our flask app and database wrapper
auth = Auth(app, db)


if __name__ == '__main__':
    auth.User.create_table(fail_silently=True)
    Note.create_table(fail_silently=True)

    app.run()
Managing content using the admin area
Now we’re ready to add the admin. Place the following lines of code after
the initialization of the Auth class:
from flask_peewee.admin import Admin

admin = Admin(app, auth)
admin.register(Note)

admin.setup()
We now have a functioning admin site! Of course, we’ll need a user log in with, so open up an interactive python shell in the directory alongside the app and run the following:
from app import auth
auth.User.create_table(fail_silently=True)  # make sure table created.
admin = auth.User(username='admin', email='', admin=True, active=True)
admin.set_password('admin')
admin.save()
It should now be possible to:
navigate to http://127.0.0.1:5000/admin/
enter in the username and password (“admin”, “admin”)
be redirected to the admin dashboard
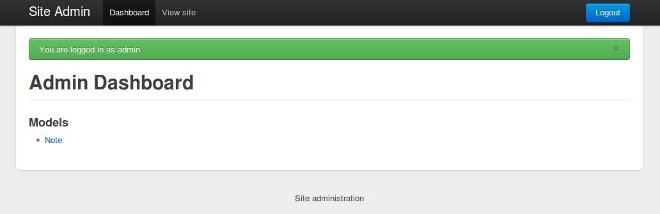
The dashboard is pretty empty right now. Go ahead and add a few notes (http://127.0.0.1:5000/admin/note/). If you navigate now to the note modeladmin you will see something like this:
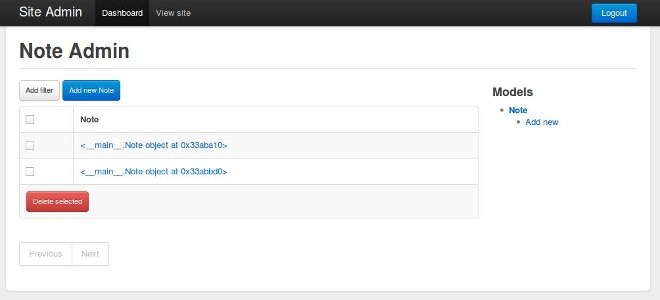
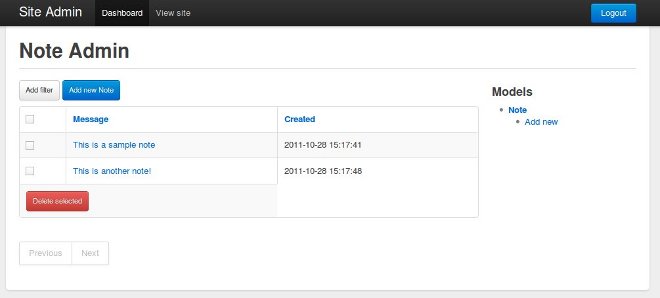
This is pretty lousy so let’s clean it up to display the message and when it was published. We can do that by customizing the columns displayed. Edit the app with the following changes:
from flask_peewee.admin import Admin, ModelAdmin

class NoteAdmin(ModelAdmin):
    columns = ('message', 'created',)

admin = Admin(app, auth)

admin.register(Note, NoteAdmin)

admin.setup()
Now our modeladmin should look more like this:
Let’s go ahead and add the auth.User model to the admin as well:
admin.register(Note, NoteAdmin)
auth.register_admin(admin)

admin.setup()
Exposing content using a REST API
Adding a REST API is very similar to how we added the Admin interface.
We will create a RestAPI object, and then register our project’s models
with it. If we want to customize things, we can subclass RestResource.
The first step, then, is to create the RestAPI object:
from flask_peewee.rest import RestAPI

# create a RestAPI container
api = RestAPI(app)

api.setup()
This doesn’t do anything yet, we need to register models with it first. Let’s
register the Note model from earlier:
# create a RestAPI container
api = RestAPI(app)

# register the Note model
api.register(Note)

api.setup()
Assuming your project is still running, try executing the following command (or just browse to the url listed):
$ curl http://127.0.0.1:5000/api/note/
You should see something like the following:
{
  "meta": {
    "model": "note",
    "next": "",
    "page": 1,
    "previous": ""
  },
  "objects": [
    {
      "message": "blah blah blah this is a note",
      "id": 1,
      "created": "2011-09-23 09:07:39"
    },
    {
      "message": "this is another note!",
      "id": 2,
      "created": "2011-09-23 09:07:54"
    }
  ]
}
Suppose we want it to also be possible for registered users to be able to POST
messages using the API. If you try and make a POST right now, you will get a
401 response:
$ curl -i -d '' http://127.0.0.1:5000/api/note/

HTTP/1.0 401 UNAUTHORIZED
WWW-Authenticate: Basic realm="Login Required"
Content-Type: text/html; charset=utf-8
Content-Length: 21
Server: Werkzeug/0.8-dev Python/2.6.6
Date: Fri, 23 Sep 2011 14:45:38 GMT

Authentication failed
This is because we have not configured any Authentication method for
our RestAPI.
Note
The default authentication mechanism for the API only accepts GET requests.
In order to handle POST/PUT/DELETE you will need to use a subclass of the
Authentication class.
In order to allow users of the site to post notes, we will use the UserAuthentication
subclass, which requires that API requests be made with HTTP Basic auth and that the
auth credentials match those of one of the auth.User models.
from flask_peewee.rest import RestAPI, UserAuthentication

# instantiate the user auth
user_auth = UserAuthentication(auth)

# create a RestAPI container
api = RestAPI(app, default_auth=user_auth)
Now we can post new notes using a command-line tool like curl:
$ curl -u admin:admin -d data='{"message": "hello api"}' http://127.0.0.1:5000/api/note/

{
  "message": "hello api",
  "id": 3,
  "created": "2011-09-23 13:14:56"
}
You can see that it returns a serialized copy of the new Note object.
Note
This is just a small example of what you can do with the Rest API – refer to the Rest API docs for more detailed information, including
limiting access on a per-model basis
customizing which fields are returned by the API
filtering and querying using GET parameters